Ionic 7 SQLite Database CRUD App Example Tutorial using Angular and @capacitor-community/sqlite
last updated on April 9, 2024 by Quéau Jean Pierre
In that tutorial we will learned how to create a Ionic7/Angular basic CRUD application and implement the @capacitor-community/sqlite plugin to store the data in a SQLite database.
The first part of the tutorial will concentrate on how to create that application and run it on a Web browser where the data will be stored on an Indexed database using sql.js and localForage modules. Go to Part 1 - Web - Table of Contents
The application can be found at Part-1/ionic7-angular-sqlite-app
Thanks to the Ionic Team and their hard work to bring CAPACITOR 5, the second part will concentrate on native platforms (iOS and Android) and also on Electron platform. Go to Part 2 - Native - Table of Contents
The application can be found at Part-2/ionic7-angular-sqlite-app
Part 1 - Web - Table of Contents
- Install New Ionic Application
- Install Required Packages
- Create the SQLite Database
- Create CRUD and SQLite Services
- Angular Plugin Implementation
- Users Component Implementation
- Update Config and Package.json Scripts
- Update tsconfig.json
- Update angular.json
- Run the Web SQLite App
- Part 1 Conclusion
Install New Ionic Application
-
Install the latest version of Ionic CLI globally installed on your device, run the below command.
sudo npm install -g @ionic/cli -
Create a new blank Ionic Angular app
!!! Select standalone when asked !!!
ionic start ionic7-angular-sqlite-app blank --type=angular --capacitor -
Go inside the project folder
cd ./ionic7-angular-sqlite-app
Install Required Packages
-
run the below commands
 npm install --save @capacitor-community/sqlite
 npm install --save @capacitor/toast
 npm install --save @ionic/pwa-elements
 npm install --save-dev copyfiles
 npm install --save-dev crypto-browserify
 npm install --save-dev stream-browserify
 npm install --save-dev vm-browserify
Create the SQLite Database
-
To easily upgrade the database from one version to the next, the database is created through an upgrade statement.
ng g class upgrades/user.upgrade.statements -
Define the upgrade statements in
upgrades/user.upgrade.statements.tsfileexport class UserUpgradeStatements { userUpgrades = [ { toVersion: 1, statements: [ `CREATE TABLE IF NOT EXISTS users( id INTEGER PRIMARY KEY AUTOINCREMENT, name TEXT NOT NULL, active INTEGER DEFAULT 1 );` ] }, /* add new statements below for next database version when required*/ /* { toVersion: 2, statements: [ `ALTER TABLE users ADD COLUMN email TEXT;`, ] }, */ ] } -
Define the User Model
ng g interface models/user -
update the
models/user.tsfile asexport interface User { id: number name: string active: number /* for version 2 email: string */ }
Create CRUD and SQLite Services
-
Run the following commands to create CRUD and SQLite services.
ng g class services/sqlite.service ng g class services/storage.service -
Open the
services/sqlite.service.tsfile and replace with the following code.import { Injectable } from '@angular/core'; import { Capacitor } from '@capacitor/core'; import { CapacitorSQLite, SQLiteConnection, SQLiteDBConnection, CapacitorSQLitePlugin, capSQLiteUpgradeOptions, capSQLiteResult, capSQLiteValues} from '@capacitor-community/sqlite'; @Injectable() export class SQLiteService { sqliteConnection!: SQLiteConnection; isService: boolean = false; platform!: string; sqlitePlugin!: CapacitorSQLitePlugin; native: boolean = false; constructor() { } /** * Plugin Initialization */ async initializePlugin(): Promise<boolean> { this.platform = Capacitor.getPlatform(); if(this.platform === 'ios' || this.platform === 'android') this.native = true; this.sqlitePlugin = CapacitorSQLite; this.sqliteConnection = new SQLiteConnection(this.sqlitePlugin); this.isService = true; return true; } async initWebStore(): Promise<void> { try { await this.sqliteConnection.initWebStore(); } catch(err: any) { const msg = err.message ? err.message : err; return Promise.reject(`initWebStore: ${err}`); } } async openDatabase(dbName:string, encrypted: boolean, mode: string, version: number, readonly: boolean): Promise<SQLiteDBConnection> { let db: SQLiteDBConnection; const retCC = (await this.sqliteConnection.checkConnectionsConsistency()).result; let isConn = (await this.sqliteConnection.isConnection(dbName, readonly)).result; if(retCC && isConn) { db = await this.sqliteConnection.retrieveConnection(dbName, readonly); } else { db = await this.sqliteConnection .createConnection(dbName, encrypted, mode, version, readonly); } await db.open(); return db; } async retrieveConnection(dbName:string, readonly: boolean): Promise<SQLiteDBConnection> { return await this.sqliteConnection.retrieveConnection(dbName, readonly); } async closeConnection(database:string, readonly?: boolean): Promise<void> { const readOnly = readonly ? readonly : false; return await this.sqliteConnection.closeConnection(database, readOnly); } async addUpgradeStatement(options:capSQLiteUpgradeOptions): Promise<void> { await this.sqlitePlugin.addUpgradeStatement(options); return; } async saveToStore(database:string) : Promise<void> { return await this.sqliteConnection.saveToStore(database); } } -
Open the
services/storage.service.tsand replace the code withimport { SQLiteDBConnection } from '@capacitor-community/sqlite'; import { Injectable} from '@angular/core'; import { SQLiteService } from './sqlite.service'; import { DbnameVersionService } from './dbname-version.service'; import { UserUpgradeStatements } from '../upgrades/user.upgrade.statements'; import { User } from '../models/user'; import { BehaviorSubject, Observable } from 'rxjs'; @Injectable() export class StorageService { public userList: BehaviorSubject<User[]> = new BehaviorSubject<User[]>([]); private databaseName: string = ""; private uUpdStmts: UserUpgradeStatements = new UserUpgradeStatements(); private versionUpgrades; private loadToVersion; private db!: SQLiteDBConnection; private isUserReady: BehaviorSubject<boolean> = new BehaviorSubject(false); constructor(private sqliteService: SQLiteService, private dbVerService: DbnameVersionService) { this.versionUpgrades = this.uUpdStmts.userUpgrades; this.loadToVersion = this.versionUpgrades[this.versionUpgrades.length-1].toVersion; } async initializeDatabase(dbName: string) { this.databaseName = dbName; // create upgrade statements await this.sqliteService .addUpgradeStatement({ database: this.databaseName, upgrade: this.versionUpgrades}); // create and/or open the database this.db = await this.sqliteService.openDatabase( this.databaseName, false, 'no-encryption', this.loadToVersion, false ); this.dbVerService.set(this.databaseName,this.loadToVersion); await this.getUsers(); } // Current database state userState() { return this.isUserReady.asObservable(); } fetchUsers(): Observable<User[]> { return this.userList.asObservable(); } async loadUsers() { const users: User[]= (await this.db.query('SELECT * FROM users;')).values as User[]; this.userList.next(users); } // CRUD Operations async getUsers() { await this.loadUsers(); this.isUserReady.next(true); } async addUser(name: string) { const sql = `INSERT INTO users (name) VALUES (?);`; await this.db.run(sql,[name]); await this.getUsers(); } async updateUserById(id: string, active: number) { const sql = `UPDATE users SET active=${active} WHERE id=${id}`; await this.db.run(sql); await this.getUsers(); } async deleteUserById(id: string) { const sql = `DELETE FROM users WHERE id=${id}`; await this.db.run(sql); await this.getUsers(); } }
To get the current database state, we imported RxJS BehaviorSubject and Observable properties and can extract the current database state by merely subscribing to them.
To manage the database versionning, a new service DbnameVersionService is required.
-
Create it with
ng g class services/dbname-version.service -
Open the
services/dbname-version.service.tsfile and replace the code withimport { Injectable } from '@angular/core'; @Injectable() export class DbnameVersionService { private _dbNameVersionDict: Map<string, number> = new Map(); constructor() { } set(dbName: string, version: number) { this._dbNameVersionDict.set(dbName, version); } getVersion(dbName: string) { if (this._dbNameVersionDict.has(dbName)) { return this._dbNameVersionDict.get(dbName); } else { return -1; } } }
Angular Plugin Implementation
For Web applications, the plugin uses the Stencil component jeep-sqlite which implies some angular files modification
-
Open the
main.tsfile and replace the code with the followingimport { enableProdMode, importProvidersFrom, APP_INITIALIZER } from '@angular/core'; import { bootstrapApplication } from '@angular/platform-browser'; import { RouteReuseStrategy, provideRouter } from '@angular/router'; import { IonicModule, IonicRouteStrategy } from '@ionic/angular'; import { routes } from './app/app.routes'; import { AppComponent } from './app/app.component'; import { environment } from './environments/environment'; import { defineCustomElements as pwaElements} from '@ionic/pwa-elements/loader'; import { defineCustomElements as jeepSqlite} from 'jeep-sqlite/loader'; import { Capacitor } from '@capacitor/core'; import { InitializeAppService } from './app/services/initialize.app.service'; import { SQLiteService } from './app/services/sqlite.service'; import { StorageService } from './app/services/storage.service'; import { DbnameVersionService } from './app/services/dbname-version.service'; if (environment.production) { enableProdMode(); } // --> Below only required if you want to use a web platform const platform = Capacitor.getPlatform(); if(platform === "web") { // Web platform // required for toast component in Browser pwaElements(window); // required for jeep-sqlite Stencil component // to use a SQLite database in Browser jeepSqlite(window); window.addEventListener('DOMContentLoaded', async () => { const jeepEl = document.createElement("jeep-sqlite"); document.body.appendChild(jeepEl); await customElements.whenDefined('jeep-sqlite'); jeepEl.autoSave = true; }); } // Above only required if you want to use a web platform <-- // Define the APP_INITIALIZER factory export function initializeFactory(init: InitializeAppService) { return () => init.initializeApp(); } bootstrapApplication(AppComponent, { providers: [SQLiteService, InitializeAppService, StorageService, DbnameVersionService, { provide: RouteReuseStrategy, useClass: IonicRouteStrategy }, importProvidersFrom(IonicModule.forRoot({})), provideRouter(routes), { provide: APP_INITIALIZER, useFactory: initializeFactory, deps: [InitializeAppService], multi: true } ], }); -
To initialize the application, an
InitializeAppServiceis used and has to be createdng g class services/initialize.app.service -
Open the
services/initialize.app.service.tsfile and replace the code withimport { Injectable } from '@angular/core'; import { SQLiteService } from './sqlite.service'; import { StorageService } from './storage.service'; import { Toast } from '@capacitor/toast'; @Injectable() export class InitializeAppService { isAppInit: boolean = false; platform!: string; constructor( private sqliteService: SQLiteService, private storageService: StorageService, ) { } async initializeApp() { await this.sqliteService.initializePlugin().then(async (ret) => { this.platform = this.sqliteService.platform; try { if( this.sqliteService.platform === 'web') { await this.sqliteService.initWebStore(); } // Initialize the myuserdb database const DB_USERS = 'myuserdb' await this.storageService.initializeDatabase(DB_USERS); // Here Initialize MOCK_DATA if required // Initialize whatever database and/or MOCK_DATA you like if( this.sqliteService.platform === 'web') { await this.sqliteService.saveToStore(DB_USERS); } this.isAppInit = true; } catch (error) { console.log(`initializeAppError: ${error}`); await Toast.show({ text: `initializeAppError: ${error}`, duration: 'long' }); } }); } } -
Open the
app.component.tsfile and replace the code withimport { CUSTOM_ELEMENTS_SCHEMA } from '@angular/core'; import { Component, EnvironmentInjector, inject } from '@angular/core'; import { IonicModule } from '@ionic/angular'; import { CommonModule } from '@angular/common'; @Component({ selector: 'app-root', templateUrl: 'app.component.html', styleUrls: ['app.component.scss'], standalone: true, imports: [IonicModule, CommonModule], schemas: [CUSTOM_ELEMENTS_SCHEMA] }) export class AppComponent { public environmentInjector = inject(EnvironmentInjector); constructor() {} } -
open the
app.routes.tsfile and replace the code withimport { Routes } from '@angular/router'; export const routes: Routes = [ { path: 'home', loadComponent: () => import('./home/home.page').then((m) => m.HomePage), }, { path: '', redirectTo: 'home', pathMatch: 'full', }, ];Users Component Implementation
In that tutorial we use a simple UI interface for CRUD operations through the use of an Angular users component. It can be easily modify to implement Reactive Forms.
-
Run the below command
ng g component components/users -
Open the
components/users/users.component.tsfile and replace the code withimport { Component, OnInit } from '@angular/core'; import { CommonModule } from '@angular/common'; import { IonicModule } from '@ionic/angular'; import { FormsModule} from '@angular/forms'; import { StorageService } from '../../services/storage.service'; import { User } from '../../models/user'; import { of, switchMap } from 'rxjs'; @Component({ selector: 'app-users', templateUrl: './users.component.html', styleUrls: ['./users.component.scss'], imports: [CommonModule, IonicModule, FormsModule], standalone: true, }) export class UsersComponent implements OnInit { newUserName = '' userList: User[] = [] isWeb: any constructor(private storage: StorageService) {} ngOnInit() { try { this.storage.userState().pipe( switchMap(res => { if (res) { return this.storage.fetchUsers(); } else { return of([]); // Return an empty array when res is false } }) ).subscribe(data => { this.userList = data; // Update the user list when the data changes }); } catch(err) { throw new Error(`Error: ${err}`); } } async createUser() { await this.storage.addUser(this.newUserName) this.newUserName = '' console.log(this.userList, '#users') } updateUser(user: User) { const active = user.active === 0 ? 1 : 0 this.storage.updateUserById(user.id.toString(), active) } deleteUser(user: User) { this.storage.deleteUserById(user.id.toString()) } } -
Open the
components/users/users.components.htmlfile and replace the code with<ion-content> <ion-row> <ion-col size="9"> <ion-item> <ion-input label="Name" labelPlacement="stacked" placeholder="Rose Miller" [(ngModel)]="newUserName" > </ion-input> </ion-item> </ion-col> <ion-col size="3"> <ion-button (click)="createUser()" expand="block" fill="outline"> <ion-icon name="add" slot="icon-only"></ion-icon> </ion-button> </ion-col> </ion-row> <ion-item *ngFor="let user of userList"> <ion-checkbox aria-label="Label" slot="start" [ngModel]="user.active" (ionChange)="updateUser(user)" > </ion-checkbox> <span> - - </span> <ion-button slot="end" (click)="deleteUser(user)" fill="clear" color="danger"> <ion-icon name="trash" slot="icon-only"></ion-icon> </ion-button> </ion-item> </ion-content>!!! Caution Between the span tags You must read
Double left Curly Bracketuser.idDouble Right Curly Bracket-Double left Curly Bracketuser.nameDouble Right Curly Bracket-Double left Curly Bracketuser.activeDouble Right Curly Bracket -
Now the
app-userscomponent can be used in the Home page. Open thehome/home.page.htmlfile and replace the code with<ion-header [translucent]="true"> <ion-toolbar> <ion-title> Managing Users </ion-title> </ion-toolbar> </ion-header> <ion-content [fullscreen]="true"> <ion-header collapse="condense"> <ion-toolbar> <ion-title size="large">Managing Users</ion-title> </ion-toolbar> </ion-header> <app-users></app-users> </ion-content> -
Then the
home.home.page.tsfile can be modified as below:import { Component } from '@angular/core'; import { IonicModule } from '@ionic/angular'; import { UsersComponent } from '../components/users/users.component'; @Component({ selector: 'app-home', templateUrl: 'home.page.html', styleUrls: ['home.page.scss'], standalone: true, imports: [IonicModule, UsersComponent ], }) export class HomePage { constructor() {} }
Update Config and Package.json Scripts
-
For Web application only the appID of the
capacitor.config.tsmust be amended withYOUR_APP_ID -
For the
package .jsonfile add the two following scripts below"build": "ng build",,"ionic:serve:before": "npm run copy:sql:wasm", "copy:sql:wasm": "copyfiles -u 3 node_modules/sql.js/dist/sql-wasm.wasm src/assets",
Update tsconfig.json
- In
compilerOptionsadd the following
     "paths":{
      "crypto":["node_modules/crypto-browserify"],
      "stream":["node_modules/stream-browserify"],
      "vm":["node_modules/vm-browserify"]
    }
Update angular.json
- In
architectunderbuildandoptionsaddallowedCommonJsDependencies
 {
    ...
  "architect": {
    "build": {
        ...
      "options": {
        "allowedCommonJsDependencies": ["crypto"],
        ...
      },
      ...
    }
  }
 }
- Update all
browserTargetwithbuildTarget.
Run the Web SQLite App
-
To run the Web app use the below command
ionic serve
This will bring you to the Managing Users page
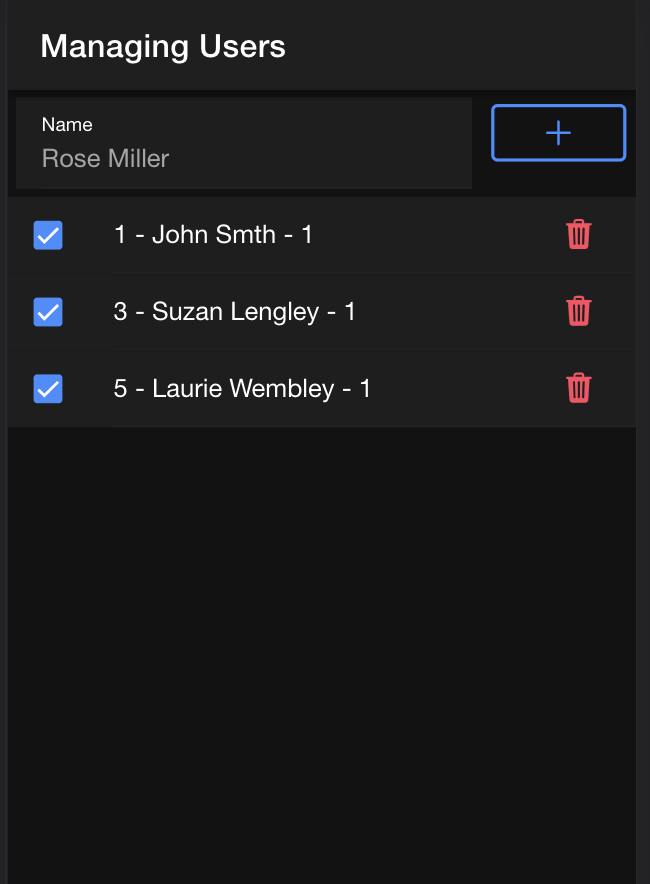
On the screen-copy, ones has entered already some users.
- To input new users
- type a new user on the input field “Rose Miller” under Name
- press on the
"+"button will add the user.
-
To update the
activevalue for a user, press on the check icon on the left it will toggle the value from 1 to 0 or from 0 to 1. - To delete a user press on the
trashicon.
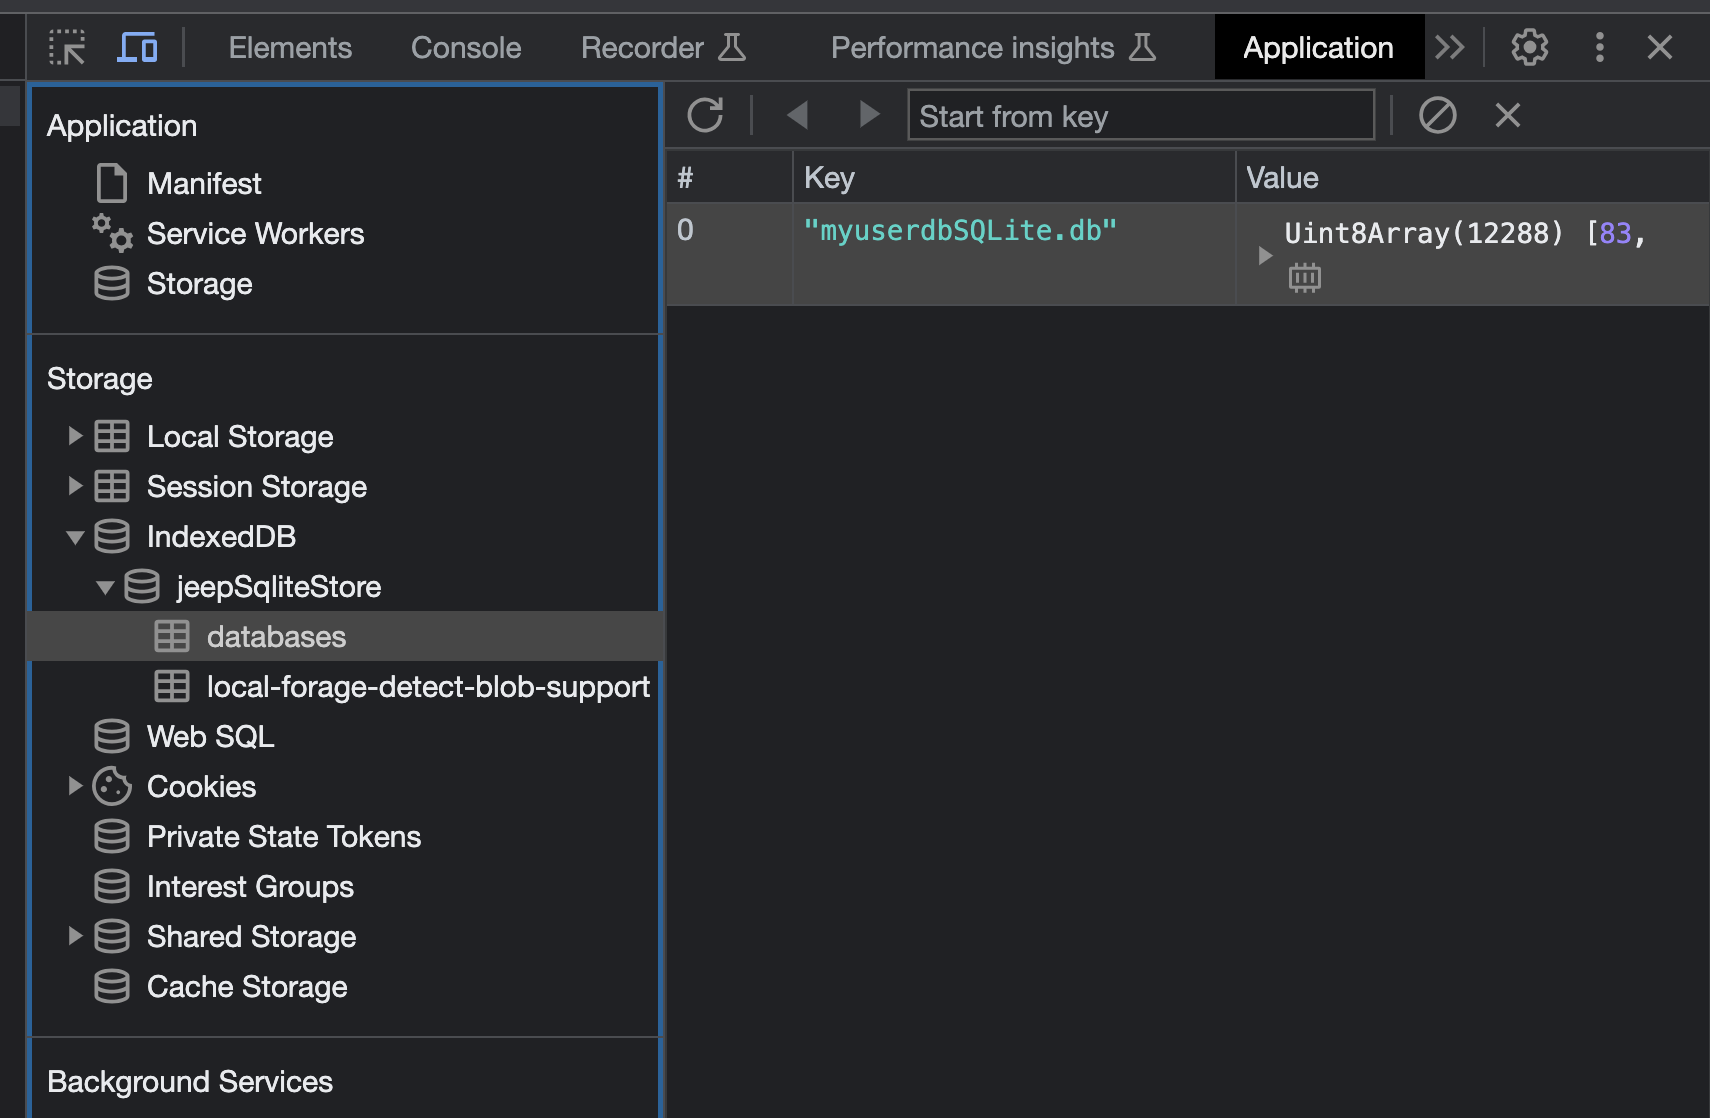
The database location can be see in the application tab of the development tools.
Part 1 Conclusion
We have completed the Part 1 - Web application of the Ionic 7 SQLite Database CRUD App Example Tutorial using Angular and @capacitor-community/sqlite.
We learned how to implement the ‘@capacitor-community/sqlite’ plugin in the Angular Framework using standalone components on a Web platform.
We learned how to used some basic methods of the ‘@capacitor-community/sqlite’ plugin to create a CRUD application from scratched and store persistent SQLite data into the Web IndexedDB browser database.
Enjoy your development from there.
Part 2 - Native - Table of Contents
- Install Native Required Packages
- Update Config file
- Update Package.json Scripts
- Run the iOS App
- Run the Android App
- Run the Electron App
- Part 2 Conclusion
Install Native Required Packages
-
In order to build Android, iOS, or Electron applications on specific devices, it is necessary to install the necessary capacitor packages first. So run the following commands:
npm install --save @capacitor/android npm install --save @capacitor/ios npm install --save @capacitor-community/electron -
Integrate the various platforms into the application.
 npx cap add android
 npx cap add ios
 npx cap add @capacitor-community/electron
Update Config file
The capacitor.config.ts file specifies parameters that the plugin needs, such as database location, database encryption, and the use of biometric authentication for access security. Such settings may be platform specific.
-
Please modify the
capacitor.config.tsfile as below :import { CapacitorConfig } from '@capacitor/cli'; const config: CapacitorConfig = { appId: 'YOUR_APP_ID', appName: 'YOUR_APP_NAME', webDir: 'www', loggingBehavior: 'debug', server: { androidScheme: "http" }, plugins: { CapacitorSQLite: { iosDatabaseLocation: 'Library/CapacitorDatabase', iosIsEncryption: false, iosKeychainPrefix: 'YOUR_APP_NAME', iosBiometric: { biometricAuth: false, biometricTitle : "Biometric login for capacitor sqlite" }, androidIsEncryption: false, androidBiometric: { biometricAuth : false, biometricTitle : "Biometric login for capacitor sqlite", biometricSubTitle : "Log in using your biometric" }, electronIsEncryption: false, electronWindowsLocation: "C:\\ProgramData\\CapacitorDatabases", electronMacLocation: "/Users/YOUR_NAME/CapacitorDatabases", electronLinuxLocation: "Databases" } } }; export default config;
Update Package.json Scripts
-
First install a new package to remove the sql.js wasm file to reduce the native package size
npm install --save-dev rimraf -
Open the
package.jsonfile and replace the scripts section with:"scripts": { "ng": "ng", "start": "npm run copy:sql:wasm && ng serve", "build:native": "npm run remove:sql:wasm && ng build", "watch": "npm run copy:sql:wasm && ng build --watch --configuration development", "test": "ng test", "lint": "ng lint", "ionic:serve:before": "npm run copy:sql:wasm", "copy:sql:wasm": "copyfiles -u 3 node_modules/sql.js/dist/sql-wasm.wasm src/assets", "remove:sql:wasm": "rimraf src/assets/sql-wasm.wasm", "ionic:ios": "npm run remove:sql:wasm && ionic capacitor build ios", "ionic:android": "npm run remove:sql:wasm && ionic capacitor build android", "electron:install": "cd electron && npm install && cd ..", "electron:prepare": "npm run remove:sql:wasm && ng build && npx cap sync @capacitor-community/electron && npx cap copy @capacitor-community/electron", "electron:start": "npm run electron:prepare && cd electron && npm run electron:start" },
Run the iOS App
-
Run the following command:
npm run ionic:ios -
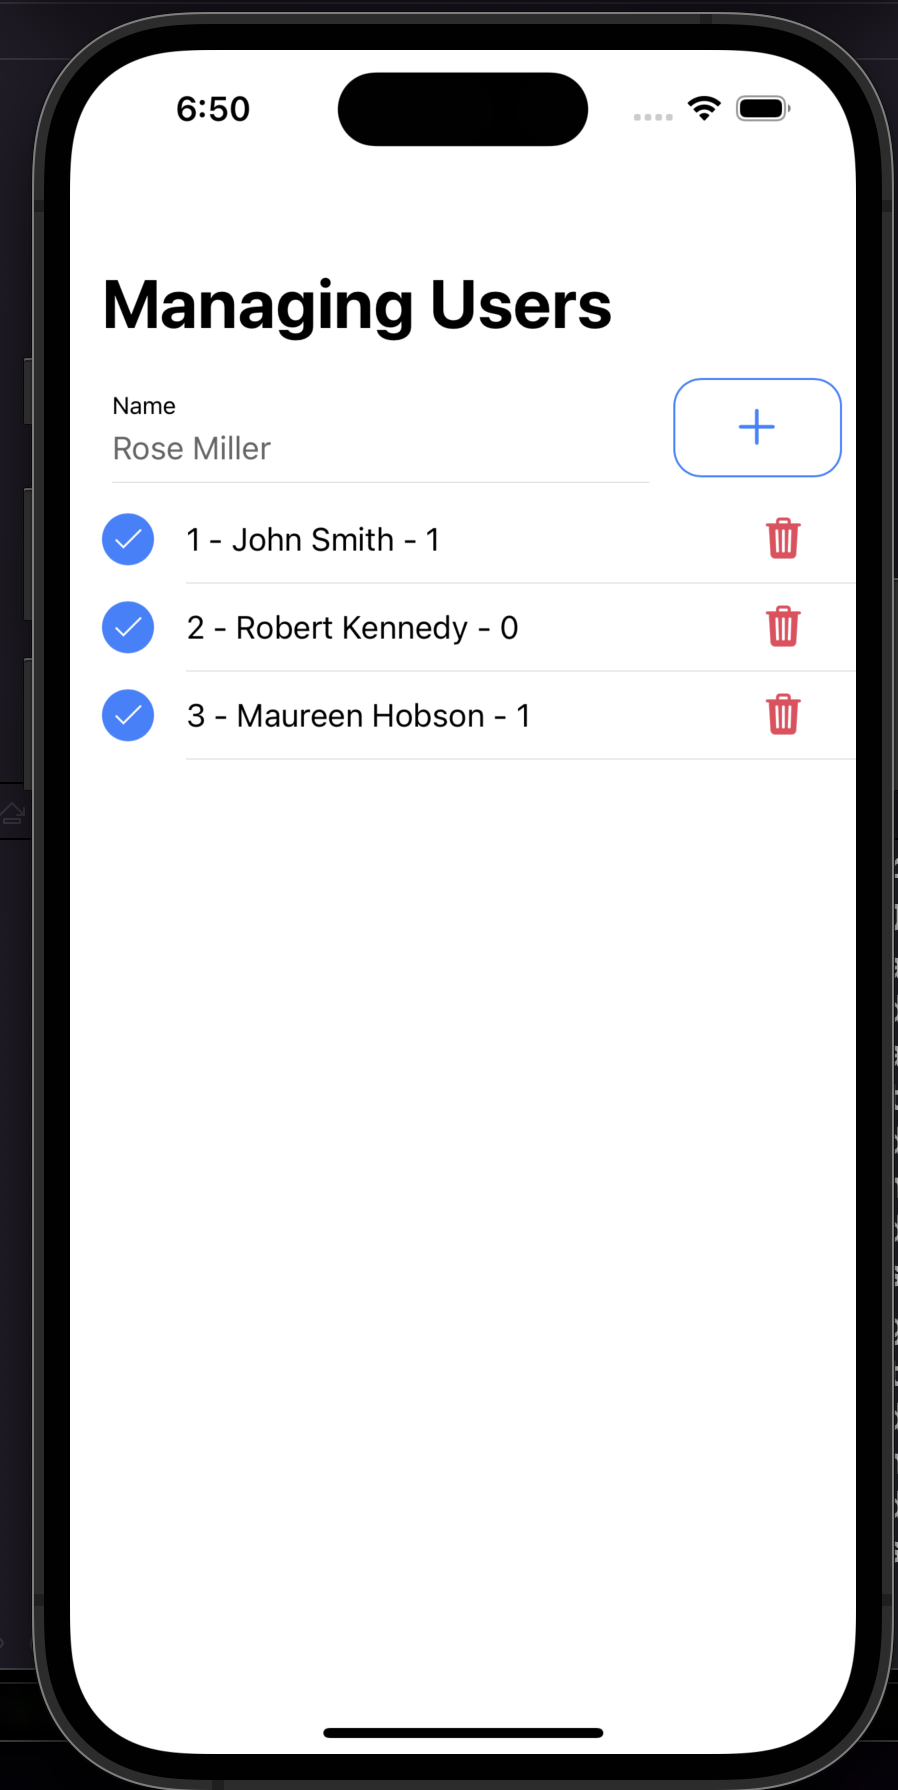
In Xcode wait for indexed file to complete, clean the project and run the app. You will get the following screen
Run the Android App
-
Run the following command:
npm run ionic:android -
In Android Studio
- go to the menu Android/Preferences/Build, Execution, Deployment/Build Tools/Gradle and then select the gradle JDK
17 Oracle OpenJDK Version 17.0.7. Then pressApplyandOK. - go to File/Sync Project With Gradle Files.
- go to Build/Clean Project.
- select your Emulator or Physical Device.
- run the app
- go to the menu Android/Preferences/Build, Execution, Deployment/Build Tools/Gradle and then select the gradle JDK
-
Screenshot of the screen:

Run the Electron App
-
Run the following command:
cd electron -
Open the
package.jsonfile and replace the scripts:, dependencies:, devDependencies: sections with:"scripts": { "build": "tsc && electron-rebuild", "electron:start-live": "node ./live-runner.js", "electron:start": "npm run build && electron --inspect=5858 ./", "electron:pack": "npm run build && electron-builder build --dir -c ./electron-builder.config.json", "electron:make": "npm run build && electron-builder build -c ./electron-builder.config.json -p always" }, "dependencies": { "@capacitor-community/electron": "^4.1.2", "@capacitor-community/sqlite": "^5.0.7", "better-sqlite3-multiple-ciphers": "^8.4.0", "chokidar": "~3.5.3", "crypto": "^1.0.1", "crypto-js": "^4.1.1", "electron-is-dev": "~2.0.0", "electron-json-storage": "^4.6.0", "electron-serve": "~1.1.0", "electron-unhandled": "~4.0.1", "electron-updater": "~5.0.1", "electron-window-state": "~5.0.3", "jszip": "^3.10.1", "node-fetch": "2.6.7" }, "devDependencies": { "@types/better-sqlite3": "^7.6.4", "@types/crypto-js": "^4.1.1", "@types/electron-json-storage": "^4.5.0", "electron": "^25.2.0", "electron-builder": "^24.6.3", "electron-rebuild": "^3.2.9", "rimraf": "^5.0.1", "typescript": "~4.3.5" }, -
Then run the following commands:
npm install cd .. npm run electron:start -
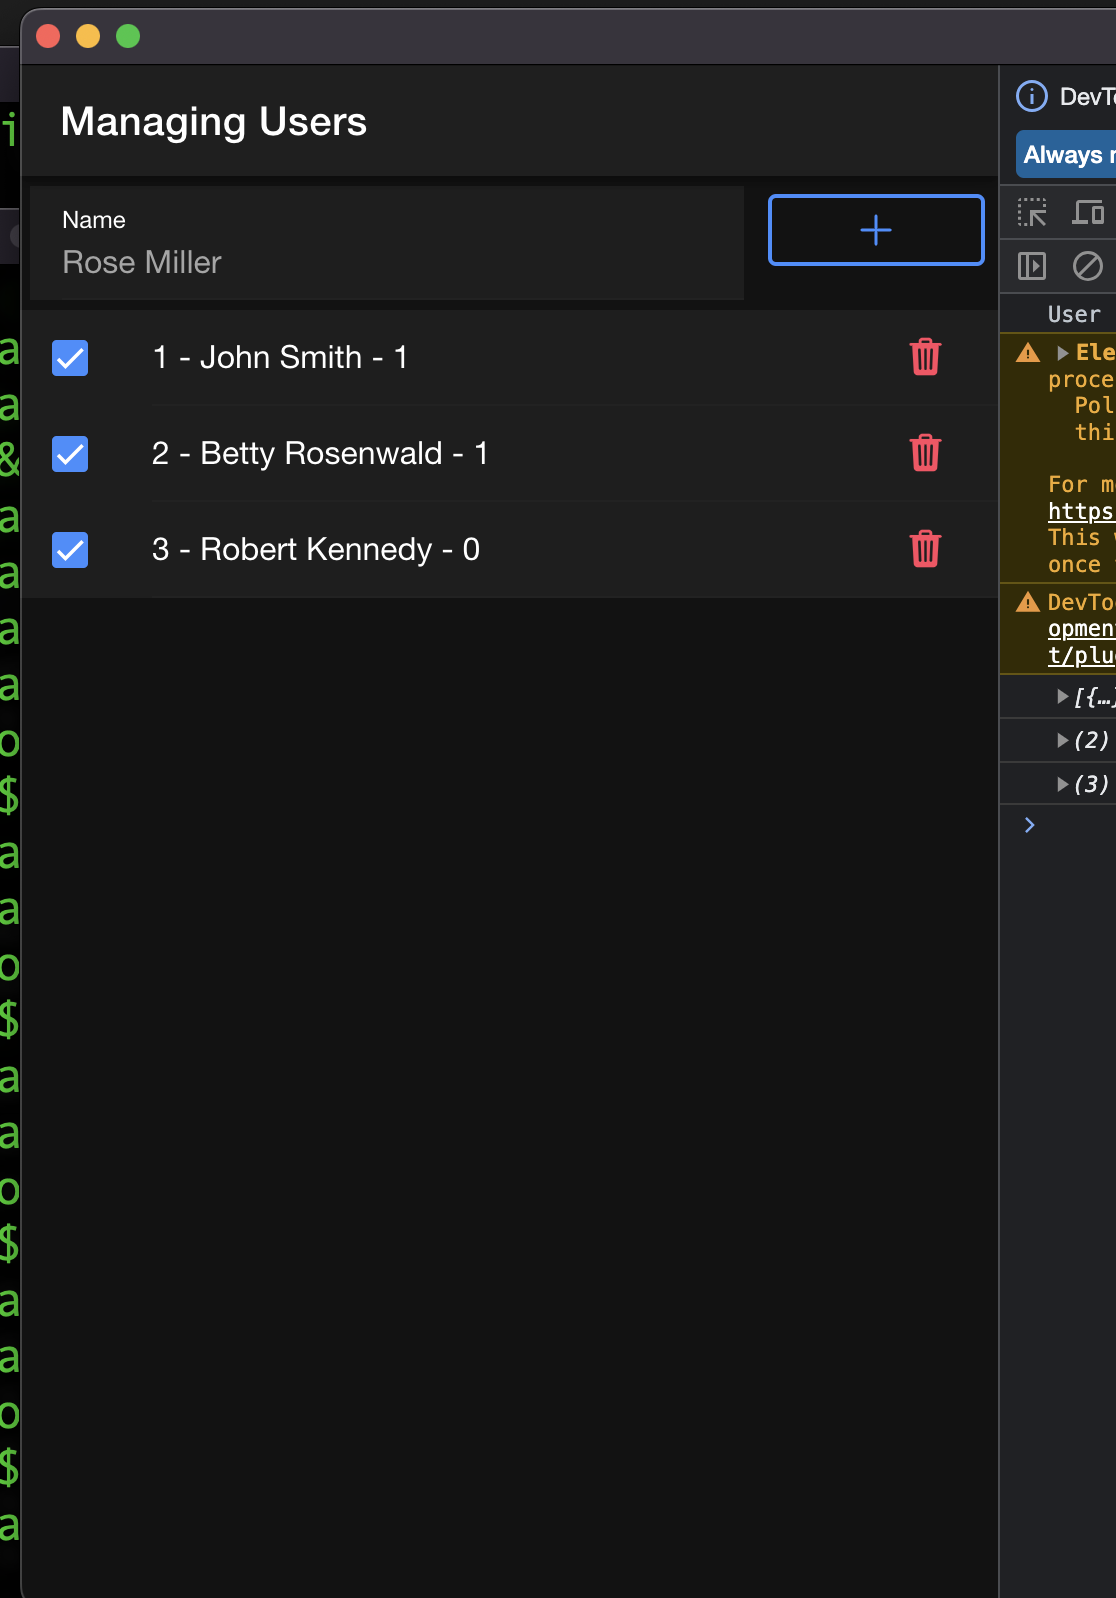
Screenshot of the screen
Part 2 Conclusion
We have completed the Part 2 - Native and Electron applications of the Ionic 7 SQLite Database CRUD App Example Tutorial using Angular and @capacitor-community/sqlite.
We have learned to adapt the capacitor.config.tsfile and the modify the scripts: section of the package.jsonfile for native apps
We learned how to build and run the application for each native platforms.
Enjoy your development from there.